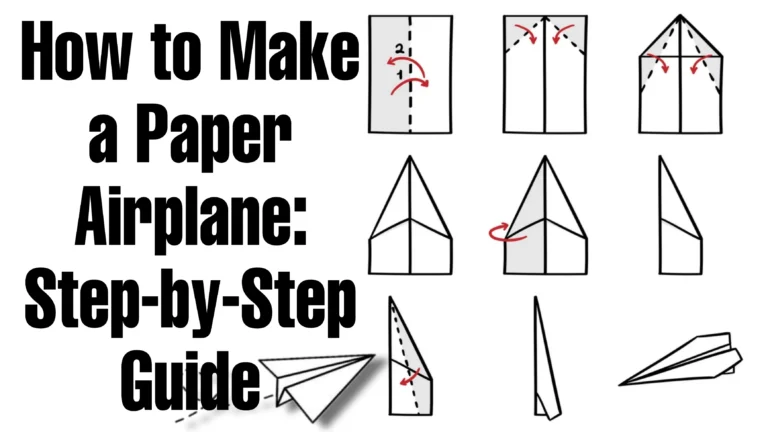
Are you looking for a fun and simple activity to pass the time? Making paper airplanes is a classic pastime that brings joy to both children and adults similar.
In this article step-by-step guide and we’ll walk you through the process of creating your very own paper airplane. Get ready to soar through the skies with your masterpiece!
How to Make a Paper Airplane: 6 Steps
Materials Needed:
- A sheet of paper (standard letter size or A4)
- Clear workspace
Let’s dive into the step-by-step instructions:
✈️ Best 10 Funny Hindi Movies to Watch With Family
Step 1: Fold the Paper in Half
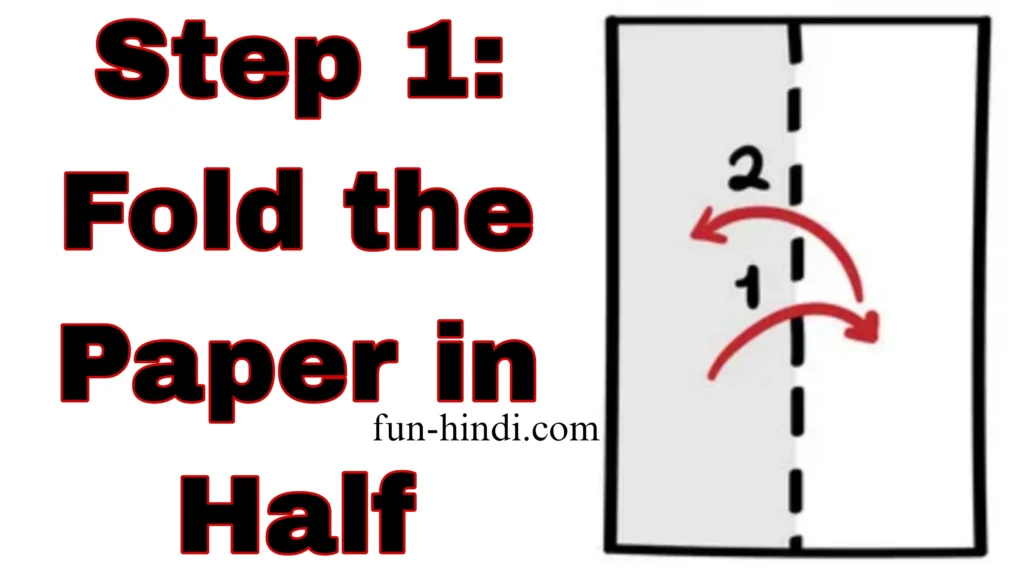
Start by taking your sheet of paper and folding it in half lengthwise.
Ensure that the edges line up neatly, and then crease the fold to secure it in place.
✈️ Facebook vip bio stylish attitude for girls and boys (1000+)
Step 2: Unfold and Fold the Top Edges

Unfold the paper and focus on the top half. Take the top corners and fold them down towards the center crease, forming two triangles at the top.
Make sure the edges align with the center crease, and then crease the folds.
Step 3: Fold the Top Triangle Down
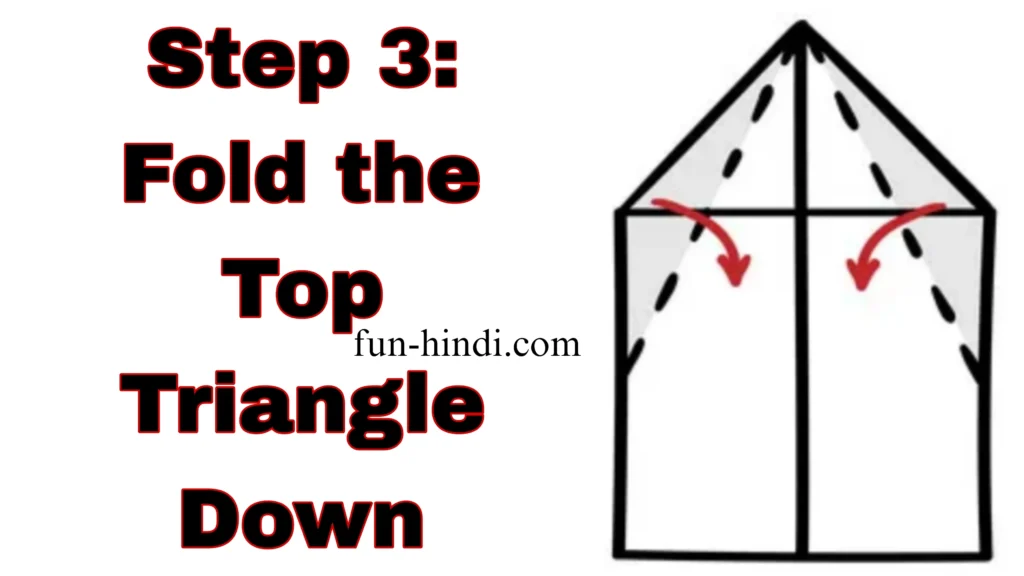
Now, fold the top triangle down towards the bottom edge of the paper. The top point of the triangle should align with the bottom edge.
This step will create a straight edge at the bottom of your airplane.
✈️ instagram vip bio stylish font for girls and boys (100+)
Step 4: Fold the Paper in Half Again
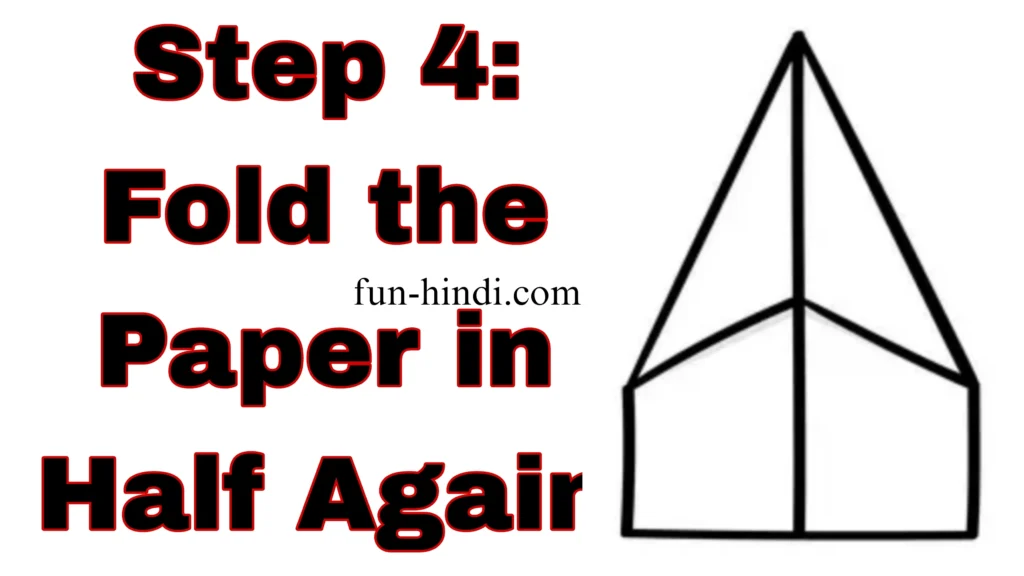
Fold the paper in half lengthwise once more, aligning the edges carefully and creasing the fold.
This step will create the main body of your paper airplane.
Step 5: Fold the Wings
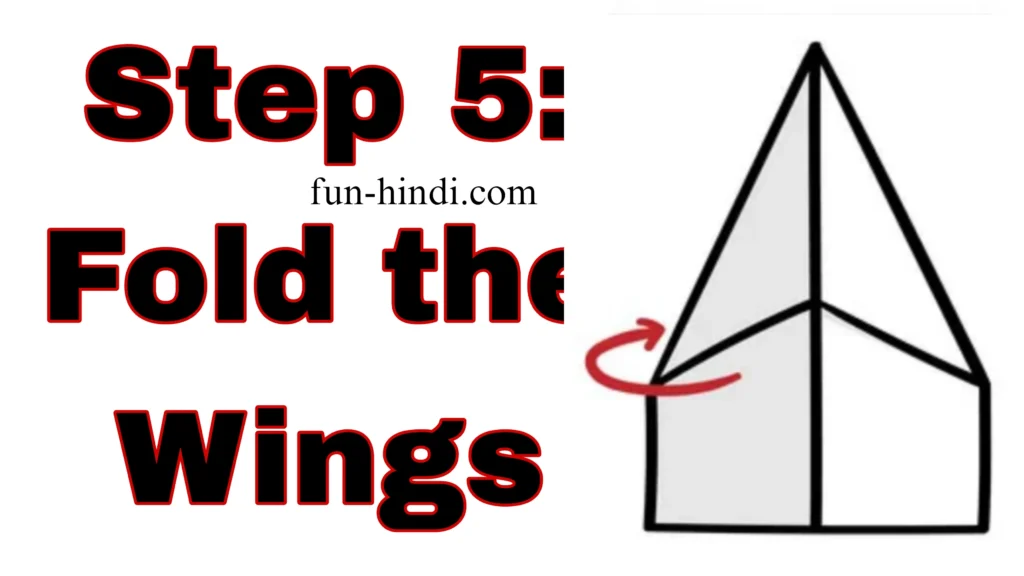
On one side of the folded paper, take the top layer and fold it diagonally, aligning the edge with the center crease. This fold will create one wing.
Repeat the same step on the other side, folding the top layer diagonally to form the second wing. Ensure that both wings are the same size and shape for optimal flight performance.
✈️ 100+ Cricket Interesting Facts
Step 6: Finishing Touches
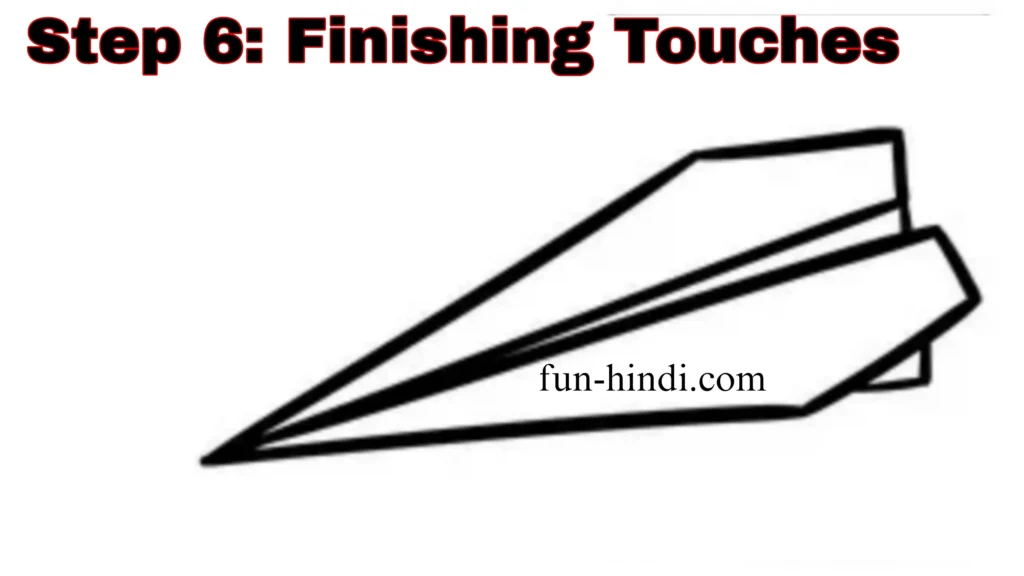
To add stability to your paper airplane, you can make small adjustments to the wings. Bend the wings slightly upward at their tips, creating a slight angle.
This modification helps your paper airplane fly smoothly through the air.
Congratulations! You have successfully created your very own paper airplane. It’s time to test its flying capabilities. ✈️✈️✈️
Find an open area, preferably outdoors, with plenty of space to launch your creation. Hold the airplane by the body, near the center, and give it a gentle toss forward. Observe its flight pattern and make adjustments as necessary to achieve better performance.
✈️ Sex knowledge in Hindi – Sex kya hai
Remember, making paper airplanes is an art that requires practice and experimentation. Don’t be discouraged if your first attempts don’t result in perfect flights.
Keep refining your folding techniques and testing different designs to find the one that suits you best.
So, gather some paper and start crafting your own fleet of paper airplanes. Enjoy the process of creation and the excitement of seeing your planes glide through the air. Happy flying!
Summary
Making paper airplanes is a fun and engaging activity for people of all ages. By following these simple steps, you can create your own paper airplane in no time.
Remember to practice, experiment with different designs, and have fun with your creations. Get ready to soar high in the sky with your homemade paper airplanes!
If you liked this post How to Make a Paper Airplane or got to learn something, please share this post on Social Networks like WhatsApp, Facebook, Instagram, Telegram, Pinterest, Do share on Twitter, Google+ and other social media sites. Also subscribe to my YouTube Channel.

